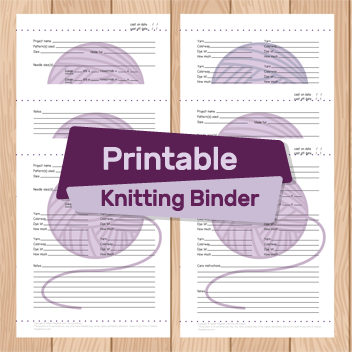
A couple weeks ago, I shared my Knitting Binder Printable. I've been doing test runs on it for almost a year, and during that time I had the chance to figure out what the best way to use it is. Today I'm going to share my process with all of you. Hopefully it helps at least one person out there become more organized.
Step One : Print and fill out the project page
Supplies:Knitting Binder Printable
White cardstock
Flair Felt Tip Pens
Juice Gel Pens
I print all of my project pages on cardstock. I do this because it really helps separate the project page and the notes that are associated with each project. I also like to have something a little more sturdy for when I add a DIY folder to the back. More on that in a bit.
My only tip for the actual printing process is to make sure that you have the “actual size” option checked in the print dialogue box before printing.
After I have the page I want printed out, I fill it out. I like using the felt tip pen for project name, patterns used, size, made for, needles, gauge and yarn. Then if I have any notes I want to add to the notes section I use the gel pens. I just like to have all the important information in a bolder pen for a quick reference. Also, this is totally optional, I like to color code my pen colors with the colors of my project. I just think it looks nice.
Step two: Where to start
One of the first things I had to do was figure out what projects I was going to include in the binder. Like I mentioned a couple weeks ago, I have one mess of a binder with some relevant notes and a notebook that I use to jot things down in when I'm knitting a project. I wasn't sure if I wanted to go through that mess and reorganize or just start fresh with my current WIPs. Really, my only deciding factor was whether or not I wanted to take the time to reorganize. I decided I didn't, so I started from my current FOs.Step three: Make folders
Supplies:Scrapbook paper
Glue stick
One of my major goals for my new binder was to have a place where I had my notes and my swatches in one place. More times than I’d like to admit, I make project notes on whatever fun notepad is nearby. To keep all of these in one place, I create folders for the back of each project page. This is why it’s important for me to print each project page on cardstock.
- Fold the piece of scrapbook paper in half (hamburger style)
- Glue each side together (see above picture)
- Glue the finished folder to the back of the project page
Once I have my folders made, I get all my notes and patterns together, three hole punch them and put them in my binder behind my project page. See the video above for a clear demonstration. I like doing this because it gives my projects a definite starting and stopping point. With my old binder, I'd have notes and patterns all thrown in together and it'd be nearly impossible to figure out which notes went with which pattern, especially since not all my notes were associated with a printed out pattern.
Step 3: Decide how to organize projects.
Honestly, I haven't decided on how to do this one yet. On one hand I want to organize them by project type i.e. Sweater, Socks, etc. On the other hand, I want to have them go in order chronologically. Currently, I have them in order of when I finished them Oldest to newest. It’s working for me now, but I’m not sure how it’ll work when I get more projects in there.This method has been working out really well for me. As I get more projects in there I'm sure I'll have to revise my method. Do you guys have any thoughts on how you’ll use these in your binders? Let me know in the comments.
Over the next few weeks and months, I'm going to share more tips on how to use my knitting binder printables follow me on Tumblr, Twitter, Instagram and Pinterest to make sure you don't miss anything.


No comments:
Post a Comment